Crawler gearbox for UNIMOG RC (RC CAR / RC TRUCK)
Description
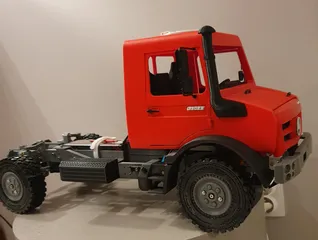
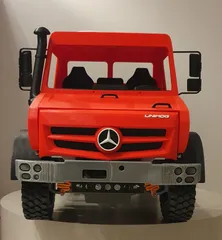
PDFThis design is a CRAWLER Gearbox that can replace the stock 2 speed automatic GBX in my UNIMOG RC Chassis (model U5023). It is smaller and looks more like a gearbox !
The idea is to make the truck more of a crawler type with a lot of torque and with a slow speed.
Whereas the auto GBX has a 1.7 to 1 reduction in low gear, this crawler GBX is providing a 6 to 1 reduction. So overall between the 1st stage gearbox , the differentials, the overall reduction is 65 to 1.
At 6500 rpm (max rpm for the 2216 880KV motor at 2S) coming from the motor the wheels will only rotate at a 100 RPM. Together with the limited slip differentials the truck should have better off-road capabilities.
Mounting is pretty straightforward if you have been able to finish the chassis (including the first stage gearbox) and the cabin 😉
There are 8 axles total and mounting sequences is as follows:
- Axle 1 (input/1st stage gearbox): The axle is not symmetrical - there is a 1 mm difference - so the part of the axle that is ca 10mm should stick out; push one 14 teeth gear on the shorter side until it is blocked on the axle ; then put one SP1 spacer (the smallest); put 2 MR117 ball bearings at each side ;
- Axle 2, 3, 4 (exactly the same): put one SP1, one 20 T gear, one SP2 spacer (2 holes), one 14 T gear and one final SP1 spacer; then put 2 MR117 ball bearings at each side
- Axle 5: is a longer Axle 2 with the last SP1 being replaced by one SP5 (5 holes)
- Axle 6: is a smaller Axle 2 with the SP2 being replaced by one SP6 (6 slots)
- Axle 7: is a transfer axle with only one 20T gear and one SP1 spacer
- The last axle (the output axle) has 1 14T gear and one SP1.
You should start mounting from the output (housing L, output axle and axle 7) then housing M, all other axles and finally housing R. There are 3 M3 screws to mount housing M on housing L and then 4 M3 screws to mount housing R on housing M. Use short screws so you don't screw into the … gears ! (It happened to me so be warned…)
Now here are a few tips if you have already mounted the tanks and the steps or the cabin.
In order to be able to replace the Auto GBX by this one you will need to:
- unscrew the 2 screws holding the cabin; remove the cabin
- unscrew the 2 screws holding the adblue tank and the right steps; remove this part
- unscrew the screws holding the left steps/box and fuel tank; remove this part
- unscrew the 2 screws holding the auto GBX and remove it
Unless you have a ton of MR117 spare BBs you will need to tear down the auto gbx to be able to reuse them here (that's what I did). And remember If you don't have enough you could use the fake ones I'm providing with the chassis. Now PLA on PLA friction is not as good as a real BB so you need to put some grease !
Printing tips:
I'm providing 3 print files mostly because this allows to have 3 filament colors.
For the housing I'm using variable layer height to make the BBs slots as round / accurate as possible. Housing L does not really need the support but it allows for better print stability.
------------------------
I retain my naming convention for parts:
XXXnn-kk-name
XXX = sub assembly
nn part number within this assembly
kk number of instances needed in one single instance of the sub assembly
Tags
Model origin
The author marked this model as their own original creation.


